A messy pantry isn’t just an eyesore, it’s a time sink that costs you money. When you can’t see what you’ve got, you buy duplicates. When spices hide in the back, they expire before you use them. And when you’re digging through stacked cans to find one ingredient, you’re wasting valuable time in the kitchen. The good news? With the right pantry organizers, you can reclaim that space and turn chaos into a system that actually works. Whether you’re dealing with a walk-in pantry, a kitchen closet, or just a couple of shelves, smart organization makes meal prep faster and grocery shopping more efficient.
Table of Contents
ToggleKey Takeaways
- Pantry organizers eliminate food waste and duplicate purchases by improving visibility, helping American households combat the estimated 30-40% food waste rate.
- Clear storage containers with airtight seals are essential for dry goods like flour and sugar, while bins and baskets work best for items like snacks and canned goods that don’t require moisture protection.
- Shelf risers, tiered racks, and door-mounted organizers double your usable space by creating vertical storage solutions without requiring a complete pantry remodel.
- Proper measurement and inventory assessment are critical before purchasing pantry organizers—standard shelves are 12-18 inches deep, and heavy items must stay on lower shelves for safety.
- DIY projects like custom shelf dividers, pull-out drawers, and lazy Susan stations can be completed in a weekend using basic tools and materials like plywood and drawer slides.
Why Pantry Organization Makes a Real Difference
Organized pantries aren’t about looking like a magazine spread. They’re about function. When you can see everything at a glance, you stop buying three jars of cinnamon because you forgot you already had two. You use ingredients before they go stale. And you cut down on the frantic pre-dinner scramble.
A well-organized pantry also reduces food waste. The USDA estimates that American households waste about 30-40% of the food supply, and a lot of that happens because items get shoved to the back and forgotten. Clear visibility means you’ll actually use what you have.
There’s a practical side to kitchen pantry organizers that goes beyond aesthetics. Good systems keep heavy items stable, prevent spills, and make cleaning easier. If you’ve ever dealt with a sticky syrup spill that spread across three shelves, you know why containment matters. Bins and baskets catch drips and crumbs, so you’re wiping out one container instead of scrubbing the entire shelf.
And if you’re prepping for a kitchen remodel or a move, getting your pantry organized first gives you a clear inventory. You’ll know exactly what storage you need in your new space, and you won’t be packing expired goods you should’ve tossed months ago.
Types of Pantry Organizers to Consider
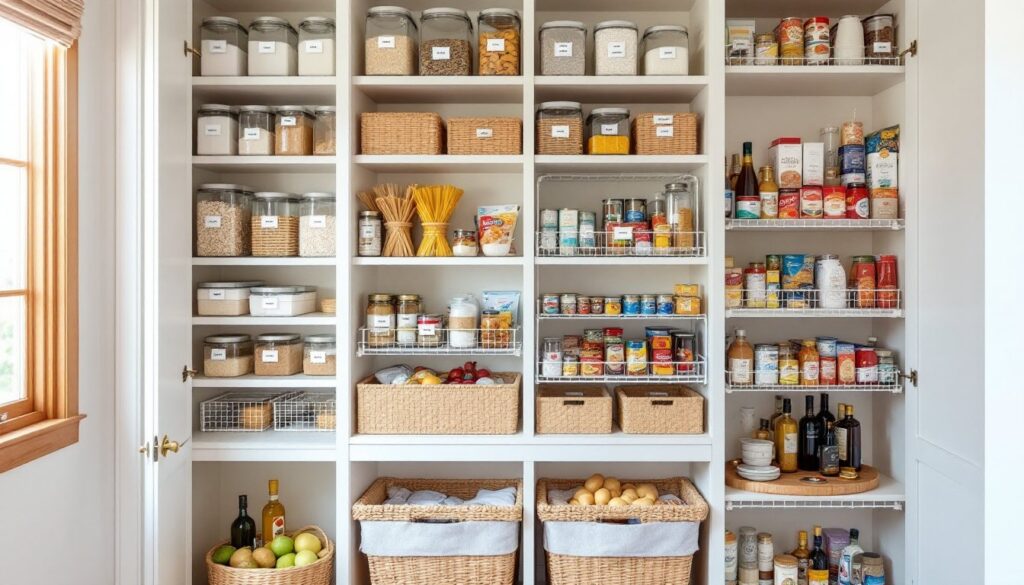
Clear Storage Containers and Bins
Clear plastic or glass containers are the workhorses of pantry organization. They keep dry goods fresh, stack efficiently, and let you see exactly how much you have left. Look for airtight seals on containers for flour, sugar, rice, pasta, and cereals, moisture is the enemy of shelf-stable foods.
Standard sizes to consider:
- Small containers (1-2 quarts) for spices, baking soda, and yeast
- Medium containers (3-5 quarts) for pasta, oats, and snacks
- Large containers (6-12 quarts) for flour, sugar, and bulk grains
BPA-free plastic is lighter and more affordable, but glass won’t absorb odors or stain over time. If you’re storing anything acidic (like tomato-based mixes), glass is the better choice. Many creative storage hacks use modular containers that nest when empty, saving space when not in use.
Bins and baskets work for items that don’t need airtight storage, snack bags, canned goods, or boxed mixes. Choose bins with handles if they’ll live on higher shelves. You don’t want to wrestle a heavy bin off a top shelf without a good grip.
Shelf Risers and Tiered Organizers
Shelf risers double your usable space by creating a second level within the same shelf. They’re especially useful for canned goods and jars, you can see labels on the back row without moving everything in front.
Expandable risers (typically 12-24 inches wide) adjust to fit your shelf width. Look for sturdy construction: flimsy wire risers sag under weight. Metal or bamboo frames hold up better than cheap plastic, especially if you’re stacking cans.
Tiered spice racks work the same way but are angled for smaller bottles. A three-tier rack can hold 18-24 spice jars in the space that used to hold six. Mount them inside cabinet doors or on pantry shelves.
For pantry closet organizers, consider pull-out drawer systems that function like shelf risers but with better access. These require mounting to the cabinet frame, so you’ll need a drill and basic hardware. Make sure you’re drilling into solid wood or plywood backing, not just drywall.
Door-Mounted Racks and Baskets
The back of a pantry door is prime real estate that most people ignore. Over-the-door racks add storage without tools or permanent installation. They hook over the top of the door and hold everything from spices to cleaning supplies.
Check your door clearance first. Most over-the-door organizers add 4-6 inches of depth, which can interfere with shelves on the opposite wall. Measure the gap between your open door and the nearest shelf before you buy.
For a more permanent solution, mount wire baskets or narrow shelves directly to the door. Use #8 x 1.5-inch screws into a solid-core door, or toggle bolts if you’re working with a hollow-core door. Space baskets 10-12 inches apart vertically to accommodate standard product heights.
Mesh or wire baskets provide visibility and airflow, which is helpful for produce like onions and potatoes. Solid baskets work better for small packets that might slip through wire gaps. Kitchen closet organizers often use a combination of both, with solid bins for snacks and wire racks for cans.
How to Choose the Right Organizers for Your Space
Start by measuring your pantry. Width, depth, and height of each shelf matter. A bin that’s half an inch too wide won’t fit, and a shelf riser that’s too tall will block access to the shelf above it.
Write down your measurements and bring a tape measure when shopping. Standard pantry shelves are 12-18 inches deep, but older homes sometimes have shallower or deeper configurations. Custom shelving might be 24 inches or more.
Take inventory of what you’re actually storing. If you buy bulk dry goods, you need large airtight containers. If you mostly have canned goods and boxed items, bins and risers make more sense. Don’t buy a spice rack system if you only own six spices.
Consider how you use your pantry. If you’re grabbing breakfast items every morning, put them at eye level in easy-access bins. Baking supplies that only come out on weekends can go higher or lower. Heavy items like bulk flour bags or canned goods belong on lower shelves to prevent accidents, and to make lifting easier on your back.
Adjustable systems offer the most flexibility. Modular bins, expandable risers, and adjustable door racks let you reconfigure as your needs change. If you’re not sure exactly what you need, start with a few versatile pieces rather than committing to a complete system.
Think about cleaning. Organizers with smooth surfaces and removable parts are easier to wipe down when spills happen. Wire baskets can be harder to clean than solid bins, but they don’t trap moisture. Choose based on what you’re storing and how messy it tends to get.
Finally, match materials to your environment. If your pantry gets warm or humid, avoid organizers that warp or rust. Bamboo and stainless steel hold up better than particleboard or untreated wood in those conditions. According to expert organizing advice, proper material selection extends the life of your storage solutions significantly.
DIY Pantry Organization Projects You Can Do This Weekend
Build Custom Shelf Dividers
Shelf dividers keep stacks of baking sheets, cutting boards, and lids from toppling over. You can make simple dividers from 1/2-inch plywood or hardboard.
Materials needed:
- 1/2-inch plywood, cut to shelf height minus 1/4 inch
- L-brackets or tension rods
- Wood glue (optional)
- Sandpaper (120-grit)
Cut dividers to fit vertically between shelves. Sand edges smooth to prevent snags. Mount with small L-brackets screwed to the shelf, or use tension rods wedged between shelves for a no-drill option. Space dividers 2-3 inches apart for sheet pans, or 1 inch apart for cutting boards.
Install Pull-Out Drawers
Deep pantry shelves hide items in the back. Pull-out drawers bring everything forward with one motion.
You’ll need:
- Drawer slides rated for 75-100 lbs (check packaging)
- 3/4-inch plywood for drawer box
- 1/4-inch plywood for drawer bottom
- Drill/driver
- Level
- Wood screws (#8 x 1.25-inch)
Measure your shelf opening and buy slides to match the depth (12, 18, or 21-inch are common). Mount slides to the inside walls of the pantry, ensuring they’re level and parallel. Build a simple drawer box from plywood, sized to fit the slides with 1/2-inch clearance on each side. Most drawer slides have template markings, follow them for proper spacing.
This project takes 2-4 hours per drawer, depending on your skill level. If you’ve never installed drawer slides before, watch a tutorial video first and consider starting with one drawer to get the hang of it.
Create a Lazy Susan Station
Lazy Susans maximize corner spaces and deep shelves. You can buy turntables or build your own from a lazy Susan bearing and two circles of 3/4-inch plywood.
For a DIY version:
- Cut two plywood circles (12-18 inches diameter, depending on shelf size)
- Attach a lazy Susan bearing between them with wood screws
- Sand edges and finish with polyurethane or paint if desired
Mount the bottom circle to the shelf with screws or leave it free-standing. Use the top for oils, vinegars, or condiments, anything you need to access from all sides. For kitchen-specific tips, design ideas and inspiration can help you customize your setup.
Add Basket Labels
This isn’t carpentry, but it’s the detail that makes everything work. Label bins and containers clearly, either with a label maker or painter’s tape and a permanent marker.
Use consistent label placement (top-right corner or centered on the front) so you can scan quickly. For clear containers, labels on the lids work well. For opaque bins, front-facing labels are best.
Safety note: When installing any pantry closet organizers that require screws or anchors, wear safety glasses to protect against wood or drywall dust. Use a stud finder to locate solid mounting points for heavy organizers, and always check weight ratings on brackets and slides before loading them up. If you’re mounting to wire shelving or older pantry systems, verify that the existing structure can handle additional weight, some wire systems aren’t rated for heavy pull-out drawers.